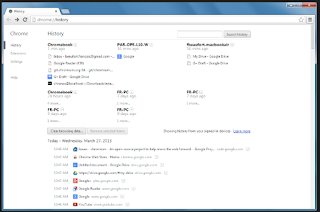
How to set Chrome to not save history.
Dear Readers,
Lets learn how to avoid Chrome to save history. ( I have seen many requests regarding this on various forums, hence thought of sharing an Idea to accomplish this. )
Google
Chrome has recently become the Default Web browser of choice for many Mac and
PC users ( including me ). It’s fast, flexible, smart, user friendly, and
relatively secure Etc Etc.
But it has an issue / a flaw: unlike most browsers, Chrome has no user setting to prevent or automatically clear the browser history. We can though always manually clear the history, but doing that takes a few clicks through a few menus; not ideal. Luckily, there’s a trick we can use to prevent browsing history from being recorded in Chrome. See below for the trick.
But it has an issue / a flaw: unlike most browsers, Chrome has no user setting to prevent or automatically clear the browser history. We can though always manually clear the history, but doing that takes a few clicks through a few menus; not ideal. Luckily, there’s a trick we can use to prevent browsing history from being recorded in Chrome. See below for the trick.
Chrome
stores the browser history in a file on your computer’s drive. If we limit
Chrome’s ability to modify that file, it won’t be able to record any web
addresses. To start, first go into Chrome and manually clear your history by
pressing Control-H for Windows. Click Clear Browsing Data,
make sure the box “Clear Browsing History” is checked, and then select “from
the beginning of time” from the drop-down menu.
Press the Clear Browsing Data button at the bottom of the window to complete the process. This gives us a blank slate from which to start.
Press the Clear Browsing Data button at the bottom of the window to complete the process. This gives us a blank slate from which to start.
Now
we must restrict access to Chrome’s history file, so that it does not start
recording again. First, quit Chrome to prevent any conflicts, and then find
Chrome’s history file. In OS X, this file is stored at the following location:
~/Library/Application
Support/Google/Chrome/Default
In
Windows, it’s:
C:\Users\[User
Name]\AppData\Local\Google\Chrome\User Data\Default
Note
that you may need to enable Windows Explorer’s “show hidden files” option to be
able to see the AppData folder.
In
either of these locations, you’ll find a file called “History” with no file
extension. This is the file we need to lock. In OS X, right click on the file
and choose Get Info (or highlight the file and press Command-I).
Under “General,” check the box for Locked. This will prevent Chrome
from modifying this file and thus stop any future browsing history from being
recorded.For Windows, right click on the History file and choose Properties.
In the Properties window, check the box for Read-Only and then
press Apply.
Once
you’ve locked the History file, open Chrome and start browsing. Then head to
your history list and you’ll see that Chrome reports “No history entries
found.” That’s it, We are done! If you want to start recording your browsing
history again, simply repeat the appropriate steps for Mac or Windows above
and uncheck the locked or read-only boxes.
At
this point, there is one important stuff worth mentioning, “why not just
use Incognito Mode?” It’s true that Incognito Mode
will prevent Chrome from recording browsing history, but it also blocks cookies
and interferes with many extensions. If you want the benefit of extensions and
cookies, such as having websites remember your account info, but simply don’t
want your browsing history recorded, the method described above is a good way
to manage what you need.
Thank
you for reading.


Comments
Post a Comment